Scalp Micropigmentation (SMP) has recently become the most sought-after cosmetic procedure for people with hair loss concerns, and it’s for a good reason. The process is non-invasive and cost-effective, and research studies suggest that it is a great option to conceal a variety of alopecias and hair transplant deformities.
Now, we are guessing that if you are reading this article, you are in the exciting process of getting this game-changing cosmetic procedure. However, before booking that appointment, it’s worth acknowledging what to expect for a seamless experience.
In today’s blog post, we have designed a step-by-step guide to preparing you for the Scalp Micropigmentation treatment. The guide will cover the consultation process and the maintenance process. Stick around to learn more!
A Comprehensive Step-by-Step Guide to Understand Scalp Micropigmentation Process
Before we move on to the steps, it’s essential to understand what the scalp micropigmentation process really is.
Scalp Micropigmentation is a non-invasive cosmetic procedure that utilises tiny electric needles to deposit tiny dots of pigment that mimic the appearance of hair follicles onto the skin of the scalp. With the help of a skilled practitioner, the dots are carefully deposited wherever hair is sparse or missing, creating an illusion of thicker and fuller hair. Below is the process of what you should expect.
Consultation
Surprisingly, the process begins before the needles are placed on your scalp. You already know what you want, right? Well, then, this is the stage you tell this to your Scalp Micropigmentation practitioner. Got a hairline style? Let them know about it. Confused about the colour pigmentation? Let them help you come up with a decision.
Ensure you do the consultation before; it allows the practitioner to understand your goals and create a customised solution that best suits them.
Colour Matching
Imagine getting a head tattoo that doesn’t match your skin colour and hair colour, and you have to bear with it for the next couple of years. Sounds like a nightmare, right? Well, this is why the colour-matching stage is very critical. It helps the practitioner choose the right colour for more realistic and long-lasting results. With a natural blend between your hairline and the pigmented areas, there is nothing to worry about.
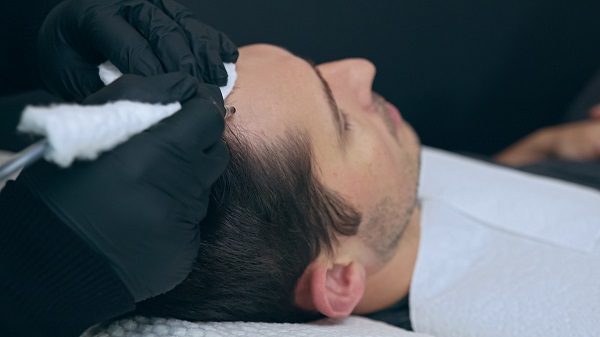
Preparation
Just like you prepare your hair before heading to the salon or barber shop, the same applies to the Scalp Micropigmentation procedure. Your scalp must be ready to ensure a seamless experience and long-lasting results.
During this stage, your practitioner cleans your scalp to remove any dirt and oils that may compromise the procedure. Others may also shave the existing hair to ensure an even canvas for the pigmentation before sterilising the skin.
Application of Pigments
Now begins the anticipated process. Since the practitioner already has the right colour pigmentation that matches your skin tone and hair colour. The next step is to utilise their hand skills. By this, we mean they should carefully adjust the depth, angles, and density to ensure the deposited dots seamlessly blend with your existing hair follicles, including the growth pattern.
Layering
Frankly, if the SMP process only involved depositing ink on the go, the result would be many dots. Multiple layers of Piaget have to be applied to build up density and create a three-dimensional effect. The result? A more natural and seamless look. Two or more layers can be added to ensure the right density is achieved. So, make sure you get a qualified SMP practitioner who knows how to ensure consistency.
Adjustments and Final Touches
After layering, both you and the practitioner should review the results.
Are you satisfied with the density or hairline? If yes, the practitioner moves to the next step, typically cleaning residues from the skin and taking quality photos. If you need readjustments, this is the time to let your practitioner know. Depending on the area you are unsatisfied with, they are there to ensure you are delighted.
Healing and Aftercare Guidelines
With electric needles penetrating through the thin layer of your skin, you will need a few weeks or a month to heal your scalp. It is essential that you follow the aftercare guidelines provided by your Scalp Micropigmentation practitioner, from avoiding exposure to harsh elements, including shampoos, to restraining from washing your scalp during the first few days after the procedure. Following these instructions carefully ensures you get more natural and long-lasting results.
Follow Up Sessions
Three or more sessions are needed to acquire more desired results. Each session is spaced several weeks apart to allow proper healing and pigment settling. Further readjustments are also made during this time, ensuring your preferences match the results.
Maintenance
Over time, the head hair tattoo may begin to fade. If you want it to last for long, you may need to go for periodic touch-up sessions. These sessions help maintain the longevity and vibrancy of the SMP results.
Booking a consultation already? Remember that Scalp Micropigmentation results are highly determined by the type of practitioner you choose. To ensure you get more natural-looking and long-lasting results, opt for a qualified practitioner with the right expertise. Check the reviews and before and after photos to make an informed decision.